Hello folks. I’m here with yet another tutorial. This time, we are going to create a media server out of a router. Sounds cool, ain’t it? Let’s do it then.
Before proceeding, I want you to go through the prerequisites for this tutorial. First of all, your router should have OpenWrt installed on your router. You can install it by following links like this. Secondly, your router should have a USB port. We will use this port to connect the mass storage device (in our case, a 16GB flash drive). The router I’m using is TP-LINK 1043ND. The version of OpenWrt I’m using is Chaos Calmer 15.05. Let’s start!

Assuming you are connected to your router through WLAN or LAN, ssh into the router console.
$ ssh root@192.168.1.1
We need to install necessary packages first. Run following command in the router’s console.
# opkg update

# opkg install kmod-usb-core kmod-usb2 kmod-usb-storage kmod-usb-storage-extras block-mount kmod-usb-uhci kmod-usb-ohci kmod-fs-btrfs kmod-nls-cp437 kmod-nls-iso8859-1 block-mount luci-app-samba luci-i18n-samba-en samba36-server minidlna luci-app-minidlna
Notice package kmod-fs-btrfs. It is used to recognize btrfs filesystem i.e. if your USB storage is formatted with that filesystem. If it is formatted with a FAT filesystem, use kmod-fs-exfat package.
The above command will install packages that will allow us to mount the USB storage and run a Samba server on top of it. minidlna package will allow us to create a media server on top of the mounted USB storage.
We need to tell the router to auto mount the USB storage so that we do not need to mount the USB storage manually each time the router boots up. Run following commands:
# mkdir /mnt/sda1

# block detect > /etc/config/fstab

# /etc/init.d/fstab enable
Plugin the USB drive and reboot the router. Run following command and you will see your USB drive mounted.
# df -h
We will now configure Samba server with/without authentication. Note that we will not use any authentication for our media server in this tutorial.
I. Without authentication: We have to edit /etc/config/samba to tell samba where are the share points in the system. This file allows us to share file system as well as the mount point.
# vi /etc/config/samba
My config file looks like below:
config samba
option name 'OpenWrt'
option workgroup 'WORKGROUP'
option description 'OpenWrt'
option homes '1'

config sambashare
option name 'sda1'
option path '/mnt/sda1'
option read_only 'no'
option create_mask '0766'
option dir_mask '0766'
option guest_ok 'no'
option users 'nobody'

config sambashare
option name 'root'
option path '/'
option read_only 'no'
option guest_ok 'no'
option create_mask '0766'
option dir_mask '0766'
Now we will edit /etc/samba/smb.conf. What is smb.conf?
My smb.conf file looks like this:
[global]
netbios name = OpenWrt
display charset = UTF-8
interfaces = 127.0.0.1/8 lo 192.168.1.1/24 br-lan
server string = OpenWrt
unix charset = UTF-8
workgroup = WORKGROUP
browseable = yes
deadtime = 30
domain master = yes
encrypt passwords = true
enable core files = no
guest account = nobody
guest ok = yes
invalid users = root
local master = yes
load printers = no
map to guest = Bad User
max protocol = SMB2
min receivefile size = 16384
null passwords = yes
obey pam restrictions = yes
os level = 20
passdb backend = smbpasswd
preferred master = yes
printable = no
security = user
smb encrypt = disabled
smb passwd file = /etc/samba/smbpasswd
socket options = TCP_NODELAY IPTOS_LOWDELAY
syslog = 2
use sendfile = yes
writeable = yes

[homes]
comment = Home Directories
browsable = no
read only = no
create mode = 0750

[sda1]
path = /mnt/sda1
valid users = nobody
read only = no
guest ok = yes
create mask = 0766
directory mask = 0766

[root]
path = /
read only = no
guest ok = no
create mask = 0766
directory mask = 0766
Notice the line guest ok = yes under [sda1]. It allows a guest user to log in without any authentication.
II. With authentication: No points for guessing what changes we need to make to provide an authentication based samba access. We have to smb.conf along with an extra step.
Change the line guest ok = yes to following under [sda1]:
guest ok = no
One more step and we’re done. OpenWrt has a user by name nobody. We will use this username to access the samba file system. Type following command to provide a password to nobody:
# smbpasswd -a nobody
Enter password and you’re done! Next time you access the samba file system, it will prompt you for username and password. Provide nobody as the username and password as the password you just entered.
Samba configuration is done. We will use a samba server without any authentication. So change the line in smb.conf under [sda1] to guest ok = yes and finally run the following command:
# /etc/init.d/samba enable
Reboot the router.
Now we will configure minidlna so that our media server gets ready in no time.
For that, we will edit /etc/config/minidlna. Run following command:
# vi /etc/config/minidlna
A basic configuration should look like this:
config minidlna 'config'
option enabled '1'
option port '8200'
option interface 'br-lan'
option log_dir '/var/log'
option inotify '1'
option notify_interval '900'
option serial '12345678'
option model_number '1'
option root_container '.'
option album_art_names 'Cover.jpg/cover.jpg/AlbumArtSmall.jpg/albumartsmall.jpg/AlbumArt.jpg/albumart.jpg/Album.jpg/album.jpg/Folder.jpg/folder.jpg/Thumb.jpg/thumb.jpg'
option friendly_name 'Super Media Server'
option db_dir '/mnt/sda1/db'
option presentation_url 'http://192.168.1.1:8200'
list media_dir 'A,/mnt/sda1/audio'
list media_dir 'V,/mnt/sda1/video'
Notice the last two lines. They are prefixed by A, and V, telling the minidlna utility where to find audio and video files respectively. You can also add a picture directory by prefixing the directory path by P,. e.g. P,/mnt/sda1/picture.
You’re almost done. Run following commands:
# /etc/init.d/minidlna enable
# /etc/init.d/minidlna start
# /usr/bin/minidlna -f /tmp/minidlna.conf  -d -R
And you’re done. Just reboot the router and use your own media server to stream audio and video files.
To see the media server in action.
I. On Ubuntu:
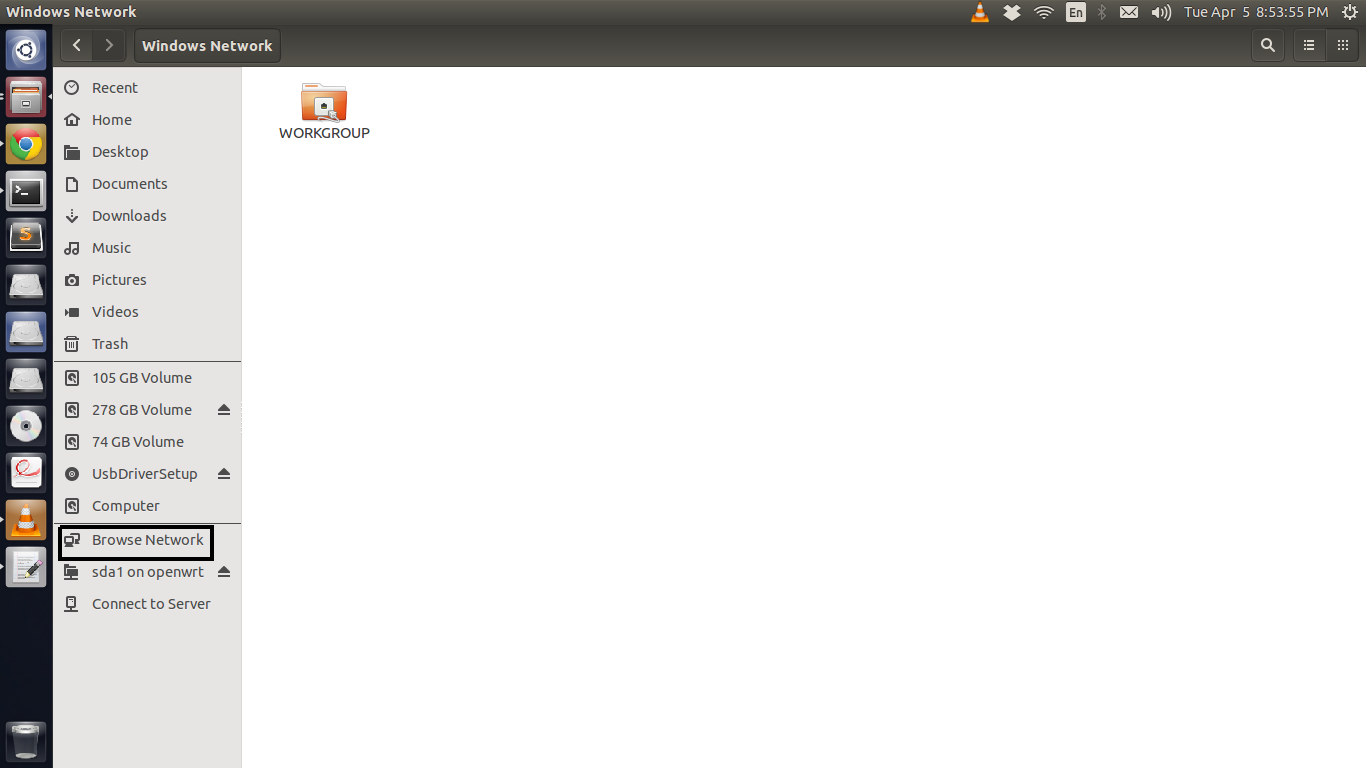
Open your file system. And click on Browse Network. You would be able to see the name of the workgroup (in our case it is WORKGROUP) under which you would be able to find the content of your USB storage device. An example is shown in the following screenshot following screenshot:

II. On Windows:
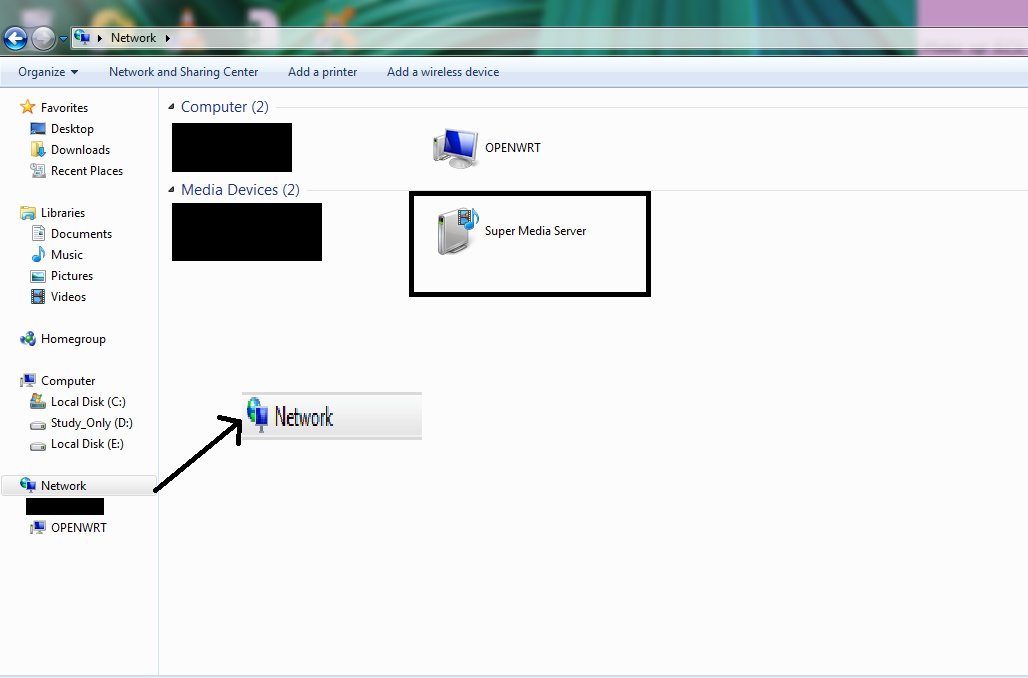
Click on Network and you would be able to see the friendly name of your media server. See the below screenshot.

III. On Android: Yes you can also stream your content on an Android phone. Download and install an app called BubbleUPnP from here. Read instructions on how to access your media server on the Google Play page (or through the app) and see your content stream on your smart phone.
That’s it for the tutorial. I’m experimenting with OpenVPN on OpenWrt so that anyone on the internet can access my media server. Will update on this blog post as soon as I manage to make it running. Thanks for your patience. Let me know if you’re stuck or have any doubts/questions.
Happy Hacking!
References:
[1] http://www.geektalks.org/setup-usb-drive-and-sambanas-on-openwrt-from-scratch/
[2] http://diantokam.blogspot.in/2012/11/openwrt-minidlna-server.html